This article is your straightforward guide to using One Legal's Business Locator tool. This feature is designed to assist legal professionals in locating crucial information about businesses to aid service of process. For an in-depth understanding of the tool, please refer to our Comprehensive Guide.
Important Note:
Access to the Locate Product is restricted to legal professionals due to the sensitive nature of the data and various governing laws. Verification may be required to confirm your law firm account and grant access.
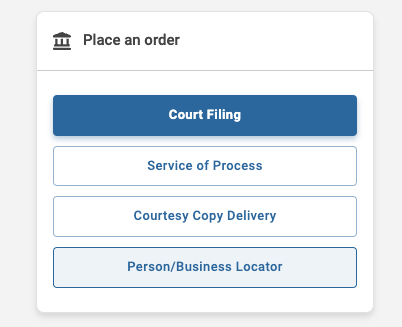
Step 1: Access the Person/Business Locator
From your dashboard, select “Person/Business Locator” to begin a search. To access this product, a user on your account must have requested access be granted. If you have not yet been granted access, you will see the “Request Access” screen. Simply click the button to initiate a request, and a member of our team will review your account and get back to you as soon as possible (maximum of 1-2 business days).
Step 2: Initiate a Business Search
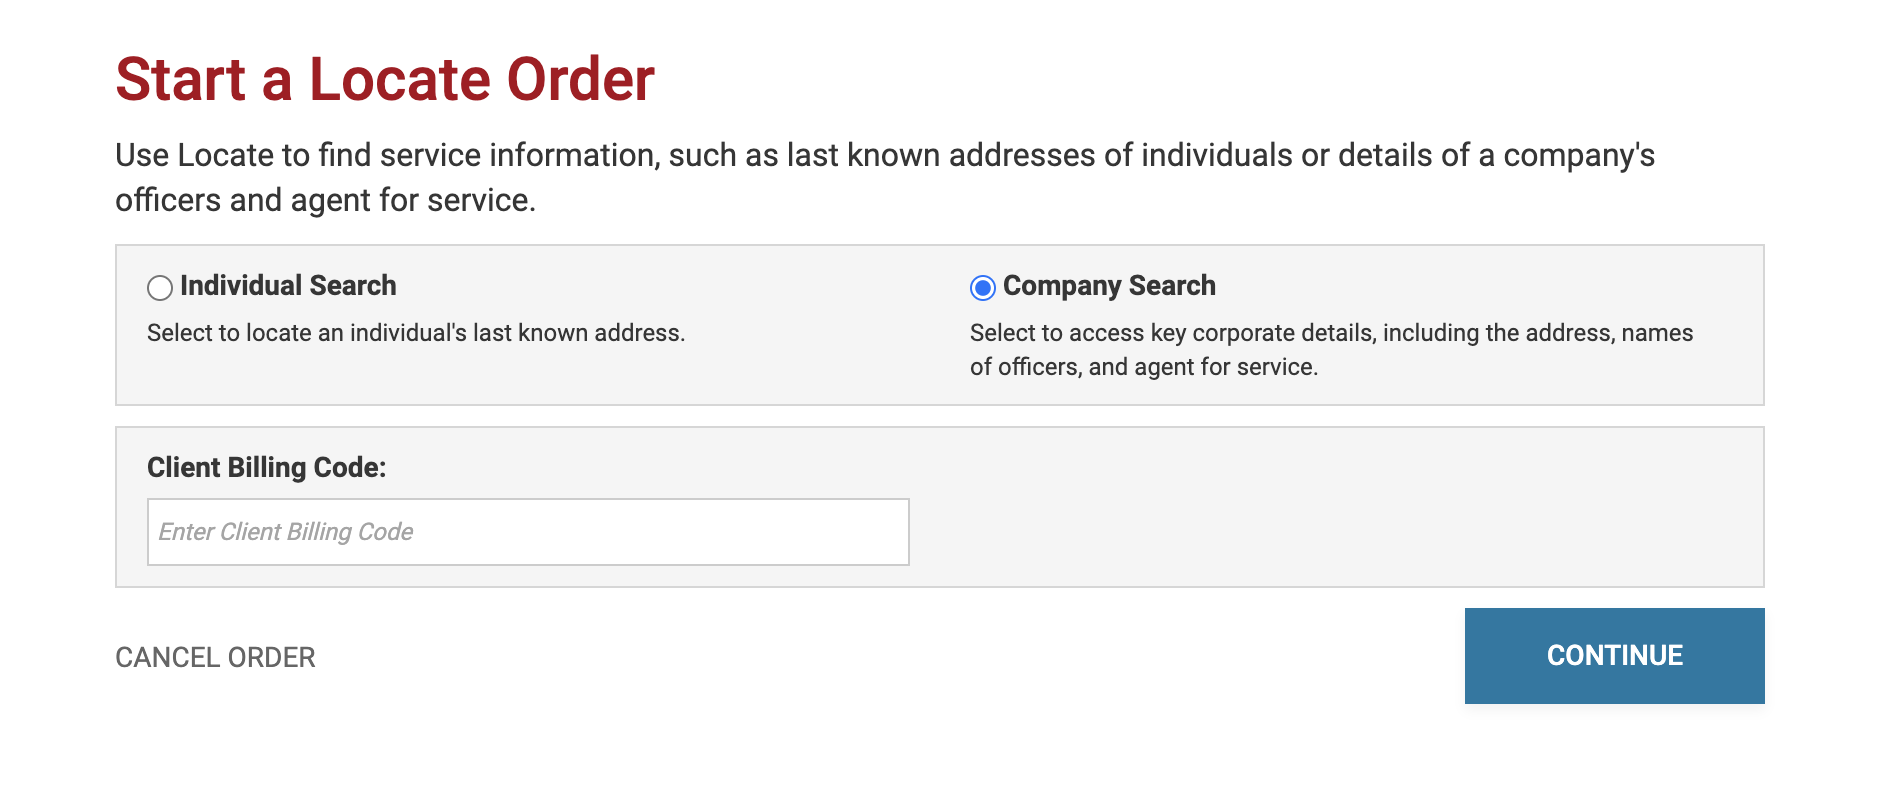
Step 2: Review Supplementary Terms of Service
You will be presented with a supplementary Terms of Service screen. This is to confirm your understanding that the product provides access to sensitive Personal Identifying Information (PII) governed by state and federal laws. Click "Continue" to proceed.
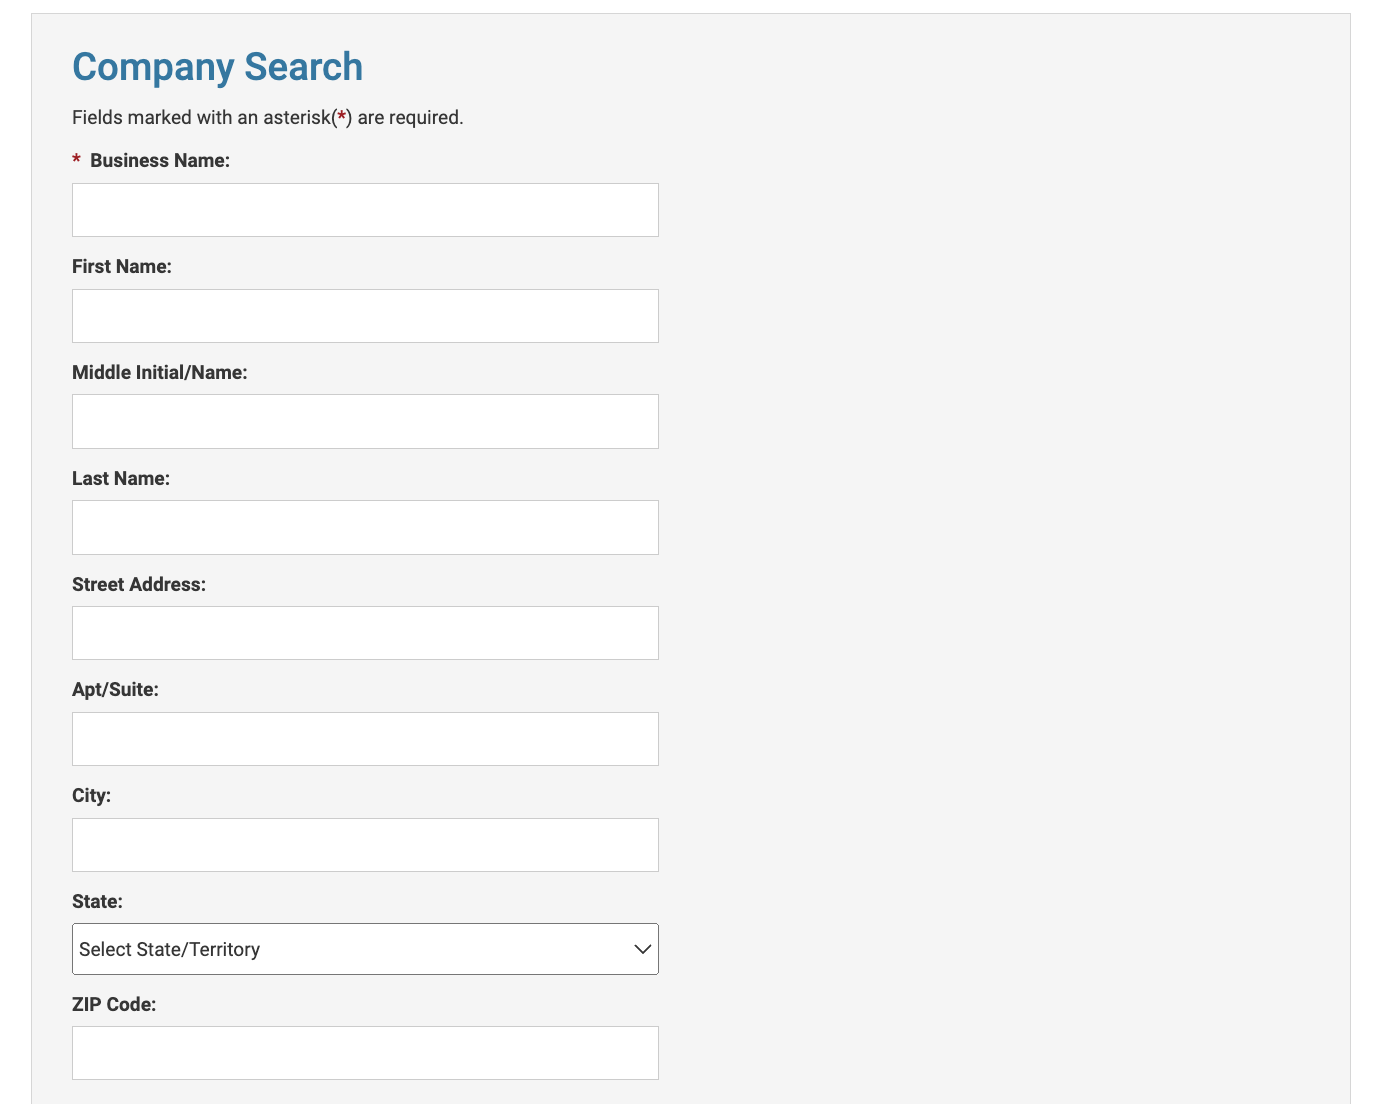
Step 3: Enter Search Criteria
In the search screen, enter the business name (this is the minimum search requirement). For the more targeted results, include an address or the name of the an officer associated with the company. Future feature releases will also permit searches by EIN (Employer Identification Number).
Step 4: Proceed to Payment
Once you’ve entered the search criteria, click "Continue" to proceed to payment. A successful search costs $25. You will only be charged if results are returned. The search scans every Secretary of State in the U.S., providing comprehensive results. Remember, including a specific "State" in your search can help narrow down results, particularly useful when the same business name exists in multiple states.
Step 5: Review Search Results
The "Review" tab will display a table of your search results with each row representing a filing that matches your criteria. If you've not specified a state, multiple entries for the same business may appear from different states. Select the filing state relevant to your litigation.
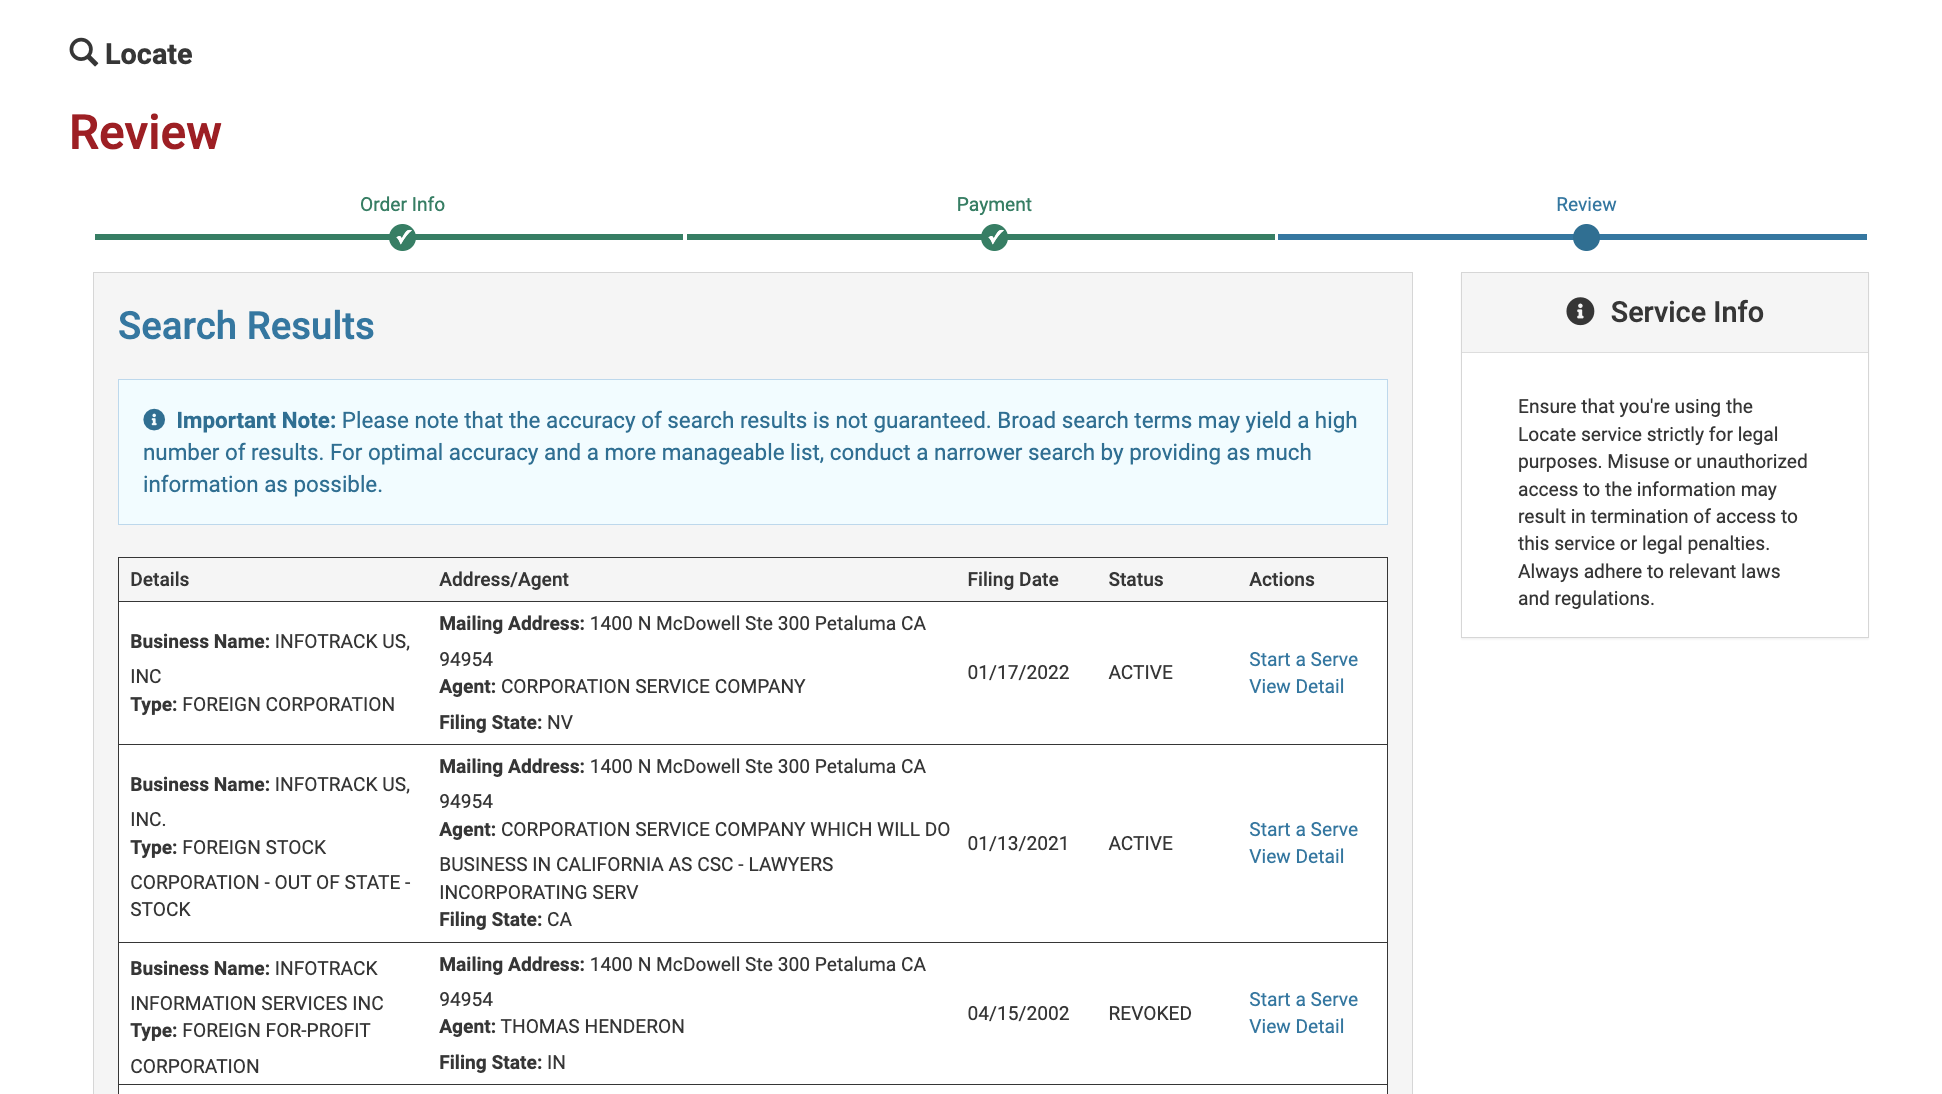
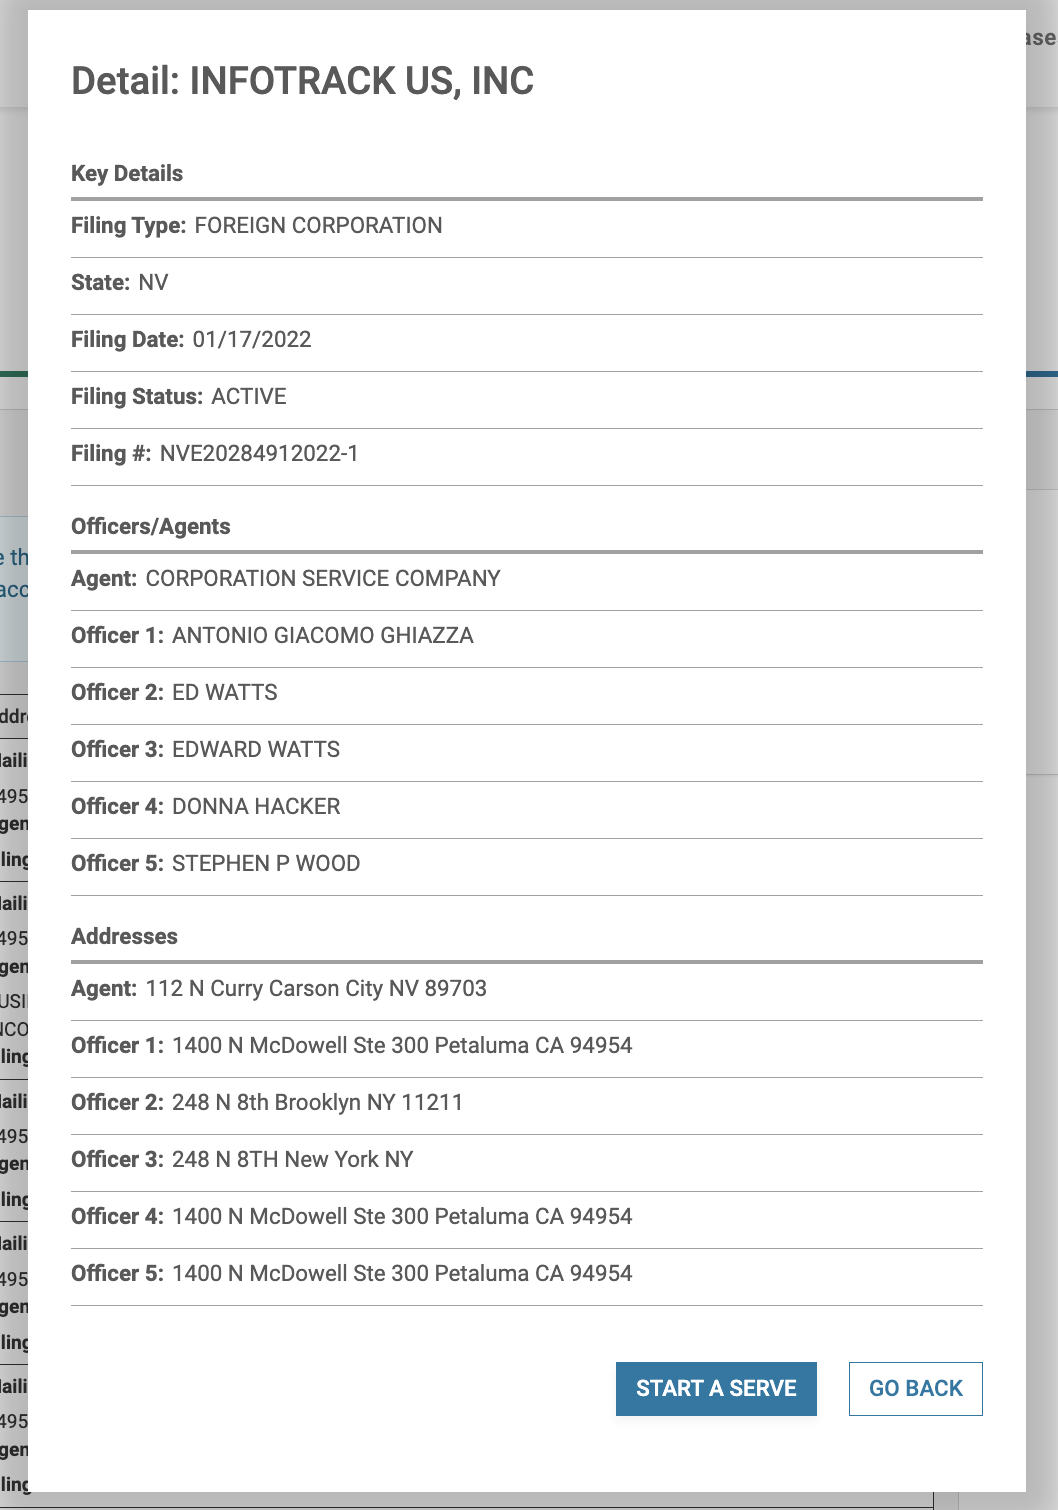
To view additional information about a specific search result, click on the "View Detail" link in the “Actions” column. This will open a window with further information such as the filing number and the names and mailing addresses of officers.
Step 6: Initiate Service of Process
If a search result matches your target, you can initiate a service of process order by clicking "Start a Serve" in the actions column. The name and address of the company's agent for service will be pre-populated in the workflow. If you wish to use an alternative address you will have the option to make edits within the Service of Process ordering workflow.
Additional Notes
Your search results will be stored and can be accessed later via your Orders page if you're not ready to proceed immediately.
By following these steps, you can effectively utilize One Legal's Business Search service, streamlining your process in litigation against businesses.